This article will explain the usage and settings within the Groups Tab
This feature makes client accounts readily available to the right teams or designated user groups. Groups can be assembled based on various criteria specific to your firm, and members within the group can be added or removed at any time. The ability to permit access to client accounts through groups can be done when setting up Client Account Access Control.
Firms that have implemented our Single-Sign-On feature can also have their IT Administration create and manage groups through Active Directory.
Note: Firm Administrators will always have access to all clients, regardless of any group settings.
Add Groups
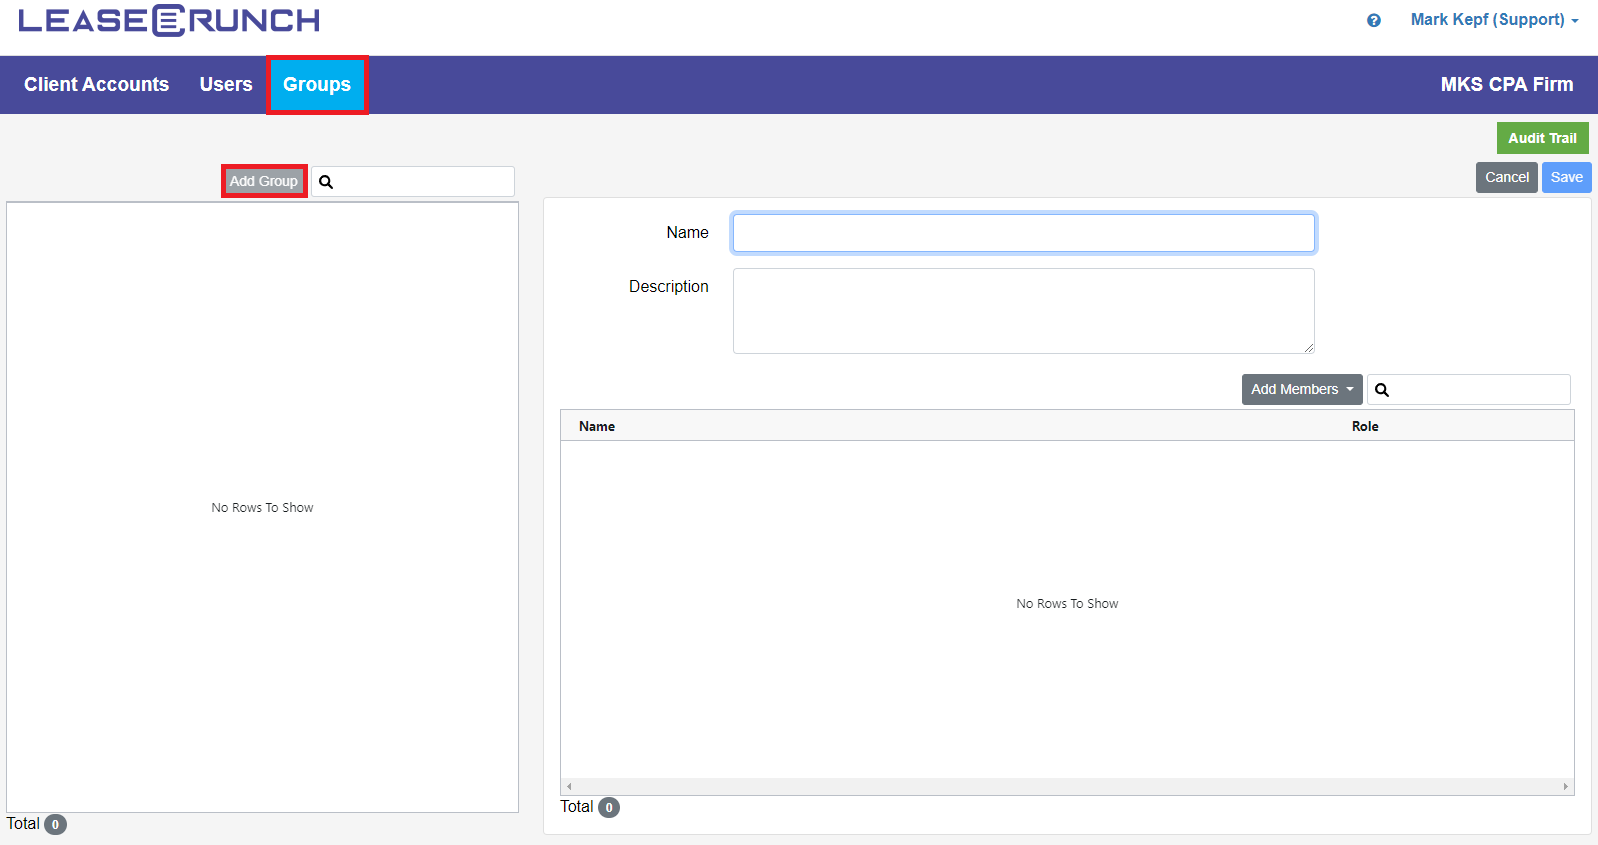
Click the Groups Tab, then click Add Group. Add a Group Name (required) and Description. Next, click Add Members to add firm staff to this group. Click Save then navigate to the Client Accounts page to add groups to specific client accounts.

Edit Client Accounts
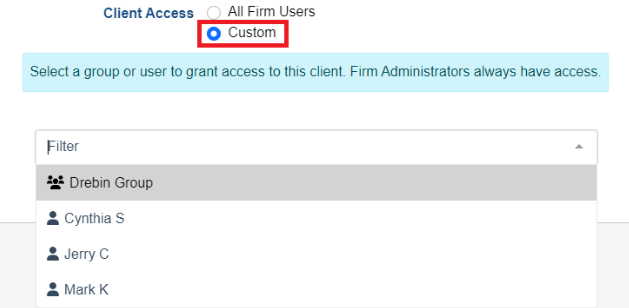
To assign the Group to the Client Account, click the blue pencil to edit the Client Account. Under Client Access, select Custom and then select the users or groups who should have access to this client account.
If not using groups, All Firm Users is selected by default.

.png?height=120&name=LC-Logo-HiRes-Purple%20(1).png)